


Beta
The Neon Auth with Better Auth is in Beta. Share your feedback on Discord or via the Neon Console.
note
Upgrading from Neon Auth SDK v0.1? See the migration guide for step-by-step instructions.
Enable Auth in your Neon project
Enable Auth in your Neon project and copy your Auth URL from Configuration.
Console path: Project → Branch → Auth → Configuration
Console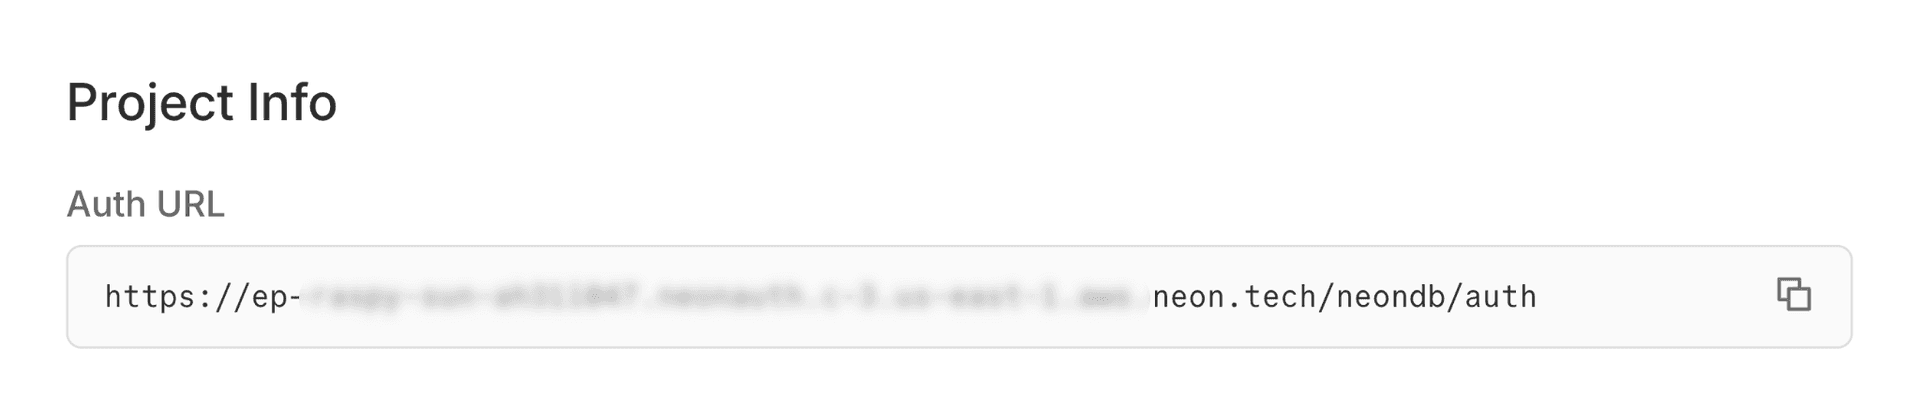
Install the Neon Auth SDK
Install the Neon SDK into your Next.js app.
If you don't have a Next.js project
npx create-next-app@latest my-app --yes cd my-appTerminalnpm install @neondatabase/authSet up environment variables
Create a
.envfile in your project root and add your Auth URL and a cookie secret:note
Replace the Auth URL with your actual Auth URL from the Neon Console. Generate a secure cookie secret with
openssl rand -base64 32..envNEON_AUTH_BASE_URL=https://ep-xxx.neonauth.us-east-1.aws.neon.tech/neondb/auth NEON_AUTH_COOKIE_SECRET=your-secret-at-least-32-characters-longCreate auth server instance
Create a unified auth instance in
lib/auth/server.ts. This single instance provides all server-side auth functionality:.handler()for API routes.middleware()for route protection.getSession()and all Better Auth server methods
See the Next.js Server SDK reference for complete API documentation.
lib/auth/server.tsimport { createNeonAuth } from '@neondatabase/auth/next/server'; export const auth = createNeonAuth({ baseUrl: process.env.NEON_AUTH_BASE_URL!, cookies: { secret: process.env.NEON_AUTH_COOKIE_SECRET!, }, });Set up auth API routes
Create an API route handler that proxies auth requests. All Neon Auth APIs will be routed through this handler. Create a route file inside
/api/auth/[...path]directory:app/api/auth/[...path]/route.tsimport { auth } from '@/lib/auth/server'; export const { GET, POST } = auth.handler();Add authentication middleware
The middleware ensures users are authenticated before accessing protected routes. Create
proxy.tsfile in your project root:proxy.tsimport { auth } from '@/lib/auth/server'; export default auth.middleware({ // Redirects unauthenticated users to sign-in page loginUrl: '/auth/sign-in', }); export const config = { matcher: [ // Protected routes requiring authentication '/account/:path*', ], };note
Your Next.js project is now fully configured to use Neon Auth. Now, lets proceed with setting up the Auth UI Provider and wrap your layout with auth context.
Configure the auth client
The Auth UI components need access to auth APIs. Create the auth client in
lib/auth/client.tsfile, which you'll pass toNeonAuthUIProvider.note
The server-side
authinstance was already created in a previous step. The client is separate and handles browser-side auth operations.lib/auth/client.ts'use client'; import { createAuthClient } from '@neondatabase/auth/next'; export const authClient = createAuthClient();Wrap app layout with auth provider
The
NeonAuthUIProvidercomponent wraps your application with authentication context and provides essential hooks and auth methods required by auth components throughout your app. To make authentication globally accessible, wrap your entire app withNeonAuthUIProvider.Hydration Warning
Add
suppressHydrationWarningto the<html>tag to prevent React hydration errors caused bynext-themesclient-side theme switching. This property only applies one level deep, so it won't block hydration warnings on other elements.Copy and paste the following code into your
app/layout.tsxfile.The
NeonAuthUIProvidercan be fully customized with settings you have configured in Neon Console. For example:- Add social providers like Google, Github, and Vercel on sign-in page
- Allow your users to create and manage organizations in
/account/organizations - Localization support
Example: Adding optional props
<NeonAuthUIProvider authClient={authClient} redirectTo="/account/settings" emailOTP social={{ providers: ['google', 'github', 'vercel'] }} credentials={{ forgotPassword: true }} organization > {children} </NeonAuthUIProvider>app/layout.tsximport { authClient } from '@/lib/auth/client'; import { NeonAuthUIProvider, UserButton } from '@neondatabase/auth/react'; import type { Metadata } from "next"; import { Geist, Geist_Mono } from "next/font/google"; import "./globals.css"; const geistSans = Geist({ variable: "--font-geist-sans", subsets: ["latin"], }); const geistMono = Geist_Mono({ variable: "--font-geist-mono", subsets: ["latin"], }); export const metadata: Metadata = { title: 'My Neon App', description: 'A Next.js application with Neon Auth', }; export default function RootLayout({ children, }: Readonly<{ children: React.ReactNode; }>) { return ( <html lang="en" suppressHydrationWarning> <body className={`${geistSans.variable} ${geistMono.variable} antialiased`} > <NeonAuthUIProvider authClient={authClient} redirectTo="/account/settings" emailOTP > <header className='flex justify-end items-center p-4 gap-4 h-16'> <UserButton size="icon" /> </header> {children} </NeonAuthUIProvider> </body> </html> ); }Add Neon Auth styles
Import the Neon Auth UI styles in your
app/globals.cssfile. Add this line at the top of the file:Not using Tailwind?
See UI Component Styles for alternative setup options.
app/globals.css@import "tailwindcss"; @import "@neondatabase/auth/ui/tailwind";note
Now that the Auth provider and styles are set up, let's build the pages for signing up and signing in
Create the Auth & Account pages
Create a dynamic route segment for authentication and account views in
app/auth/[path]/page.tsxandapp/account/[path]/page.tsxrespectively.AuthView- with dynamic route segment covers the following paths:/auth/sign-in- Sign in with email/password and social providers/auth/sign-upNew account registration/auth/sign-outSign the user out of the applications
AccountView- with dynamic route segment covers the following paths:/account/settings- User can manage their profile details/account/security- Change password and list active session
create app & account pageCreate a new page in
app/auth/[path]/page.tsxand copy-paste following code:import { AuthView } from '@neondatabase/auth/react'; export const dynamicParams = false; export default async function AuthPage({ params }: { params: Promise<{ path: string }> }) { const { path } = await params; return ( <main className="container mx-auto flex grow flex-col items-center justify-center gap-3 self-center p-4 md:p-6"> <AuthView path={path} /> </main> ); }Access user data on server and client
Server Components:
- Use the
authinstance fromlib/auth/server.tsto access session data and call auth methods in server components and server actions.
Client Components:
- Use the
authClientfromlib/auth/client.tsto access session data and call auth methods in client components.
Access user dataCreate a new page at
app/server-rendered-page/page.tsxand add the following code:import { auth } from '@/lib/auth/server'; // Server components using auth methods must be rendered dynamically export const dynamic = 'force-dynamic'; export default async function ServerRenderedPage() { const { data: session } = await auth.getSession(); return ( <div className="max-w-xl mx-auto p-6 space-y-4"> <h1 className="text-2xl font-semibold">Server Rendered Page</h1> <p className="text-gray-400"> Authenticated:{' '} <span className={session ? 'text-green-500' : 'text-red-500'}> {session ? 'Yes' : 'No'} </span> </p> {session?.user && <p className="text-gray-400">User ID: {session.user.id}</p>} <p className="font-medium text-gray-700 dark:text-gray-200">Session and User Data:</p> <pre className="bg-gray-100 dark:bg-gray-800 p-4 rounded text-sm overflow-x-auto text-gray-800 dark:text-gray-200"> {JSON.stringify({ session: session?.session, user: session?.user }, null, 2)} </pre> </div> ); }- Use the
Start your app
Start the development server, and then open http://localhost:3000/
- Visit
/auth/sign-into sign in or sign up - Visit
/account/settingsto view account settings - Visit
/server-rendered-pageto see user data on server - Visit
/client-rendered-pageto see user data on client - Visit
/api/secure-api-routeto see user data from API route
Safari users
Safari blocks third-party cookies on non-HTTPS connections. Use
npm run dev -- --experimental-httpsand openhttps://localhost:3000instead.Terminalnpm run dev- Visit