


This guide covers connecting MCP clients to the Neon MCP Server for natural language interaction with your Neon Postgres databases.
Security
The Neon MCP Server is intended for development and testing only. Always review LLM-requested actions before execution. See MCP security guidance.
Quick setup (Cursor, VS Code, Claude Code)
The fastest way to get started:
npx neonctl@latest initThis installs the MCP server for all your projects with API key-based authentication so you can skip OAuth windows. It also adds the VS Code extension for editors that support it and adds Neon's agent skills to help agents use Neon the right way. Then restart and ask your AI assistant "Get started with Neon".
If you only want the MCP server and nothing else, use:
npx add-mcp https://mcp.neon.tech/mcpThis adds the MCP config to your editor's configuration files. Add -g for global (user-level) setup instead of project-level. Restart your editor (or enable the MCP server in your editor's settings); when you use the connection, an OAuth window will open to authorize. For API key authentication, add --header "Authorization: Bearer $NEON_API_KEY". For more options, see the add-mcp repository.
Setup options
- Quick Setup: Cursor, Claude Code, and VS Code support automatic setup with
npx neonctl@latest init(MCP server with API key auth, VS Code extension where supported, and agent skills) - OAuth: Connect to Neon's remote MCP server (no local installation needed)
- Local: Run the MCP server locally with your API key (requires Node.js >= v18)
For Local setup, you'll need a Neon API key.
Cursor
Run the init command:
npx neonctl@latest initAuthenticates via OAuth, creates an API key, installs the Neon extension (which includes the MCP Server), and installs agent skills. Then ask your AI assistant "Get started with Neon".
For more, see Get started with Cursor and Neon Postgres MCP Server.
Claude Code
Run the init command:
npx neonctl@latest initAuthenticates via OAuth, creates an API key, configures the MCP Server in ~/.claude.json, and installs agent skills. Then ask your AI assistant "Get started with Neon".
For more, see Get started with Claude Code and Neon Postgres MCP Server.
VS Code (with GitHub Copilot)
note
To use MCP servers with VS Code, you need GitHub Copilot and GitHub Copilot Chat extensions installed
Run the init command:
npx neonctl@latest initAuthenticates via OAuth, creates an API key, installs the Neon extension (which includes the MCP Server), and installs agent skills. Then ask your AI assistant "Get started with Neon".
For a detailed guide including an Azure Function REST API example, see Using Neon MCP Server with GitHub Copilot in VS Code.
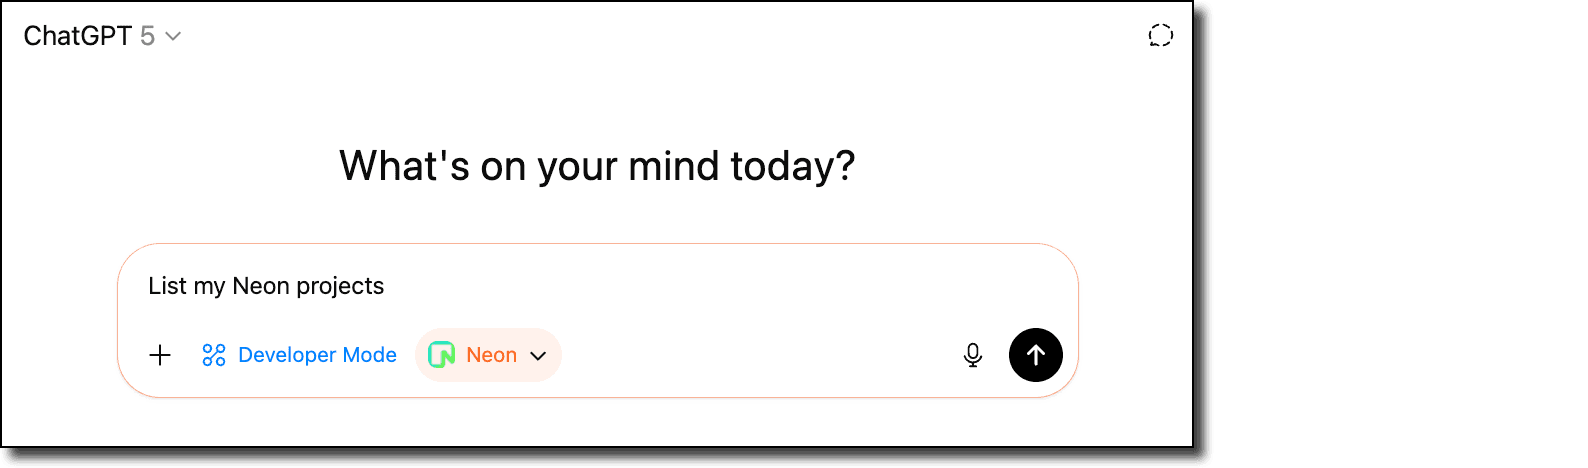
ChatGPT
Connect ChatGPT to Neon using custom MCP connectors. Enable Developer mode, add the Neon connector, then enable it per chat.
-
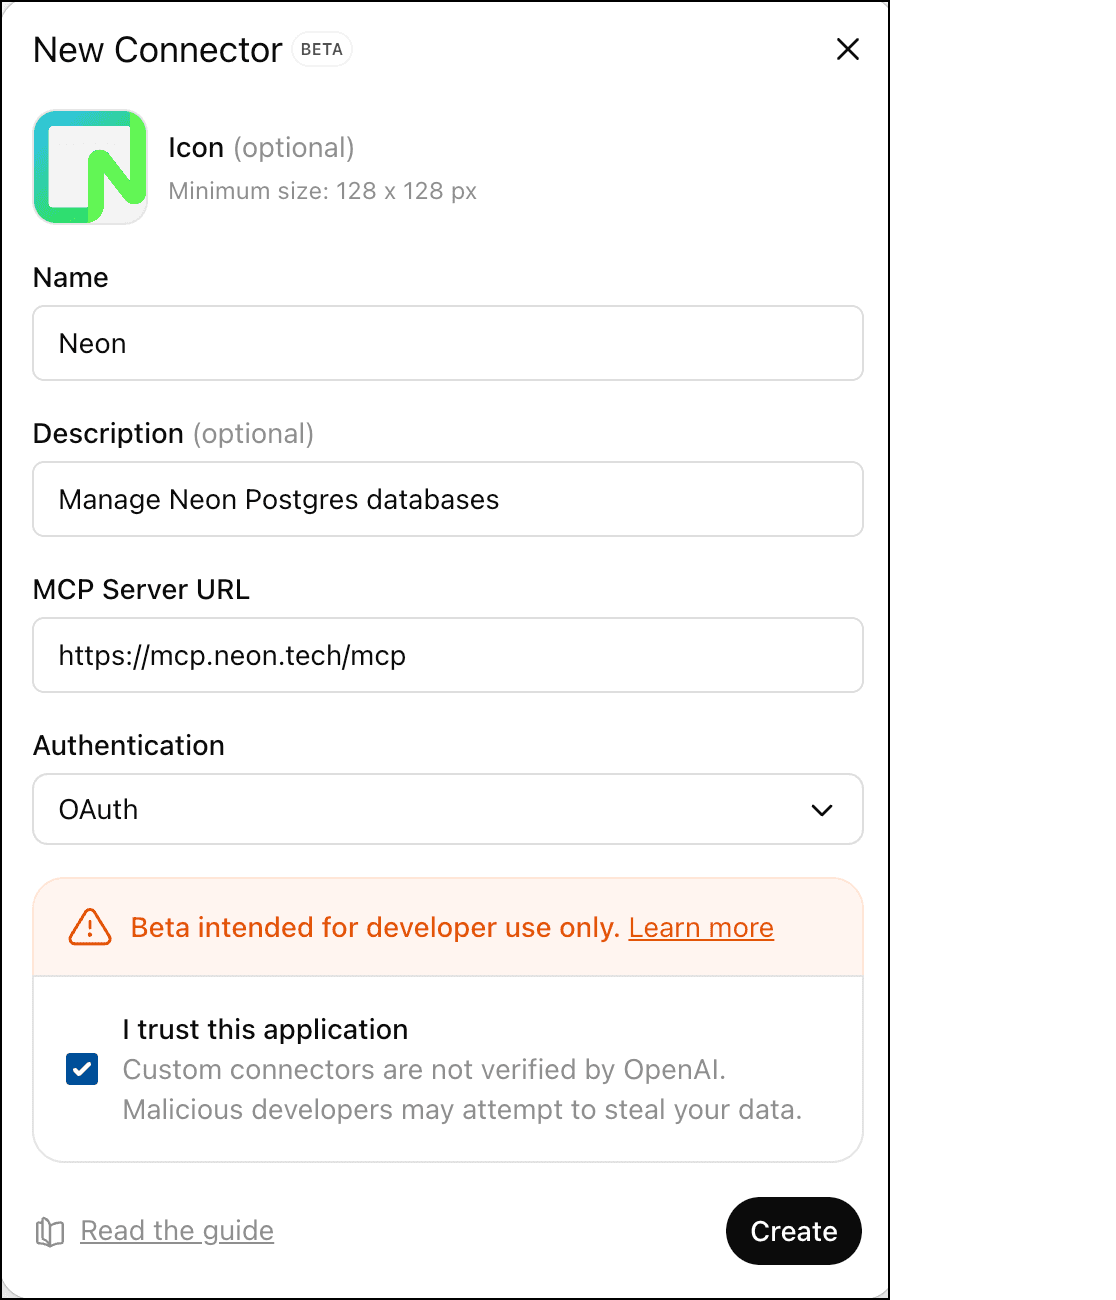
Add MCP server to ChatGPT
In your ChatGPT account settings, go to Settings → Connectors → Advanced Settings and enable Developer mode.
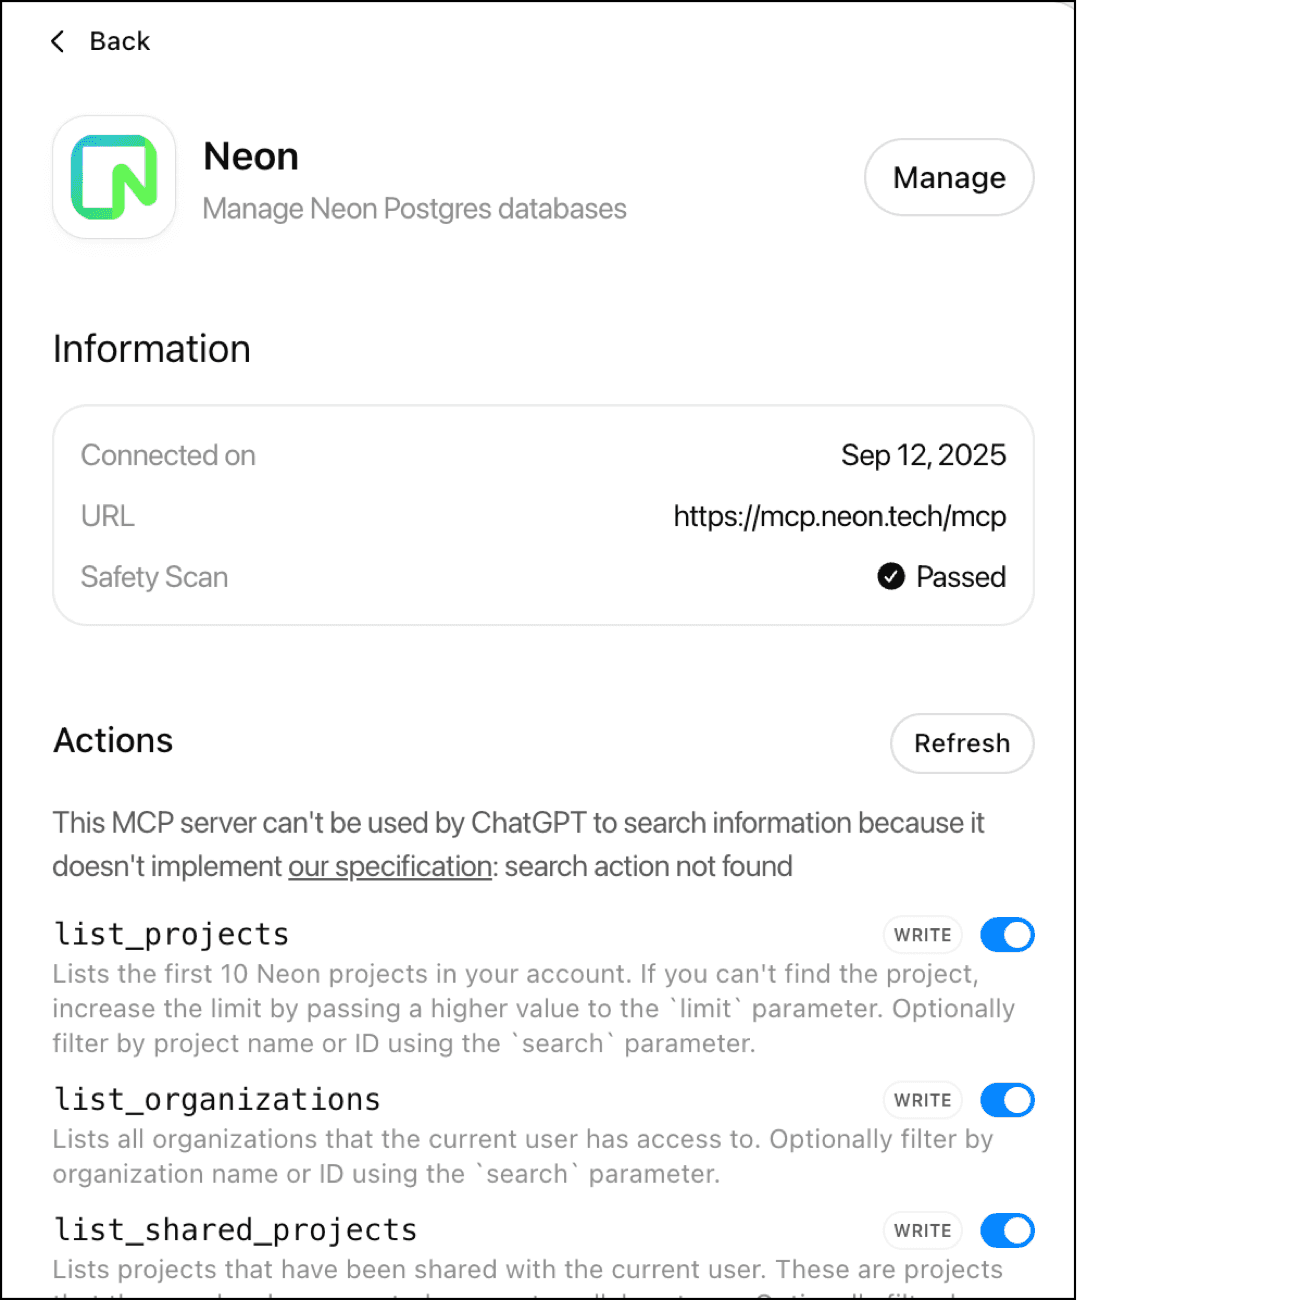
Still on the Connectors tab, you can then create a Neon connection from the Browse connectors section. Use the following URL:
https://mcp.neon.tech/mcpMake sure you choose OAuth for authentication and check "I trust this application", then complete the authorization flow when prompted.
-
Enable Neon per chat
In each chat where you want to use Neon, click the + button and enable Developer Mode for that chat. Under Add sources, you can then enable the Neon connector you just created.
Once connected, you can use natural language to manage your Neon databases directly in ChatGPT.
Claude Desktop
npx add-mcp https://mcp.neon.tech/mcp -a claude-desktopRestart Claude Desktop. When the OAuth window opens, click Authorize to complete the connection.
For more, see Get started with Neon MCP server with Claude Desktop.
Cline (VS Code Extension)
-
Open Cline in VS Code (Sidebar -> Cline icon).
-
Click MCP Servers Icon -> Installed -> Configure MCP Servers to open the configuration file.
-
Add the "Neon" server entry within the
mcpServersobject:{ "mcpServers": { "neon": { "command": "npx", "args": ["-y", "mcp-remote@latest", "https://mcp.neon.tech/mcp"] } } } -
Save the file. Cline should reload the configuration automatically.
-
When the OAuth window opens in your browser, review the requested permissions and click Authorize to complete the connection.
For more, see Get started with Cline and Neon Postgres MCP Server.
Windsurf (Codeium)
-
Open Windsurf and navigate to the Cascade assistant sidebar.
-
Click the hammer (MCP) icon, then Configure which opens up the "Manage MCPs" configuration file.
-
Click on "View raw config" to open the raw configuration file in Windsurf.
-
Add the "Neon" server entry within the
mcpServersobject:{ "mcpServers": { "neon": { "command": "npx", "args": ["-y", "mcp-remote@latest", "https://mcp.neon.tech/mcp"] } } } -
Save the file.
-
Click the Refresh button in the Cascade sidebar next to "available MCP servers".
-
When the OAuth window opens in your browser, review the requested permissions and click Authorize to complete the connection.
For more, see Get started with Windsurf and Neon Postgres MCP Server.
Zed
note
MCP support in Zed is currently in preview. Ensure you're using the Preview version of Zed to add MCP servers (called Context Servers in Zed). Download the preview version from zed.dev/releases/preview.
npx add-mcp https://mcp.neon.tech/mcp -a zedRestart Zed (or enable the MCP server in settings). When the OAuth window opens, click Authorize to complete the connection.
For more details, including workflow examples and troubleshooting, see Get started with Zed and Neon Postgres MCP Server.
Other MCP clients
For Cursor, VS Code, and Claude Code, use npx neonctl@latest init as the preferred setup (see Quick setup above). For other clients, or if you only want the MCP server, use add-mcp:
npx add-mcp https://mcp.neon.tech/mcpThis tool auto-detects supported clients and configures them. Use -a <agent> to target a specific agent (e.g., -a cursor). Add -g for global (user-level) setup instead of project-level. For more options (including global vs project-level), see the add-mcp repository. For manual configuration, add one of these to your client's mcpServers section:
OAuth (remote server):
"neon": {
  "command": "npx",
  "args": ["-y", "mcp-remote@latest", "https://mcp.neon.tech/mcp"]
}
Local setup:
"neon": {
  "command": "npx",
  "args": ["-y", "@neondatabase/mcp-server-neon", "start", "<YOUR_NEON_API_KEY>"]
}
For Windows-specific configurations, see Local MCP Server.
Troubleshooting
Configuration Issues
If your client does not use JSON for configuration of MCP servers (such as older versions of Cursor), you can use the following command when prompted:
# For OAuth (remote server)
npx -y mcp-remote https://mcp.neon.tech/mcp

# For Local setup
npx -y @neondatabase/mcp-server-neon start <YOUR_NEON_API_KEY>
note
For clients that don't support Streamable HTTP, you can use the deprecated SSE endpoint: https://mcp.neon.tech/sse. SSE is not supported with API key authentication.
OAuth Authentication Errors
When using the remote MCP server with OAuth authentication, you might encounter the following error:
{"code":"invalid_request","error":"invalid redirect uri"}This typically occurs when there are issues with cached OAuth credentials. To resolve this:
- Remove the MCP authentication cache directory:
rm -rf ~/.mcp-auth - Restart your MCP client application
- The OAuth flow will start fresh, allowing you to properly authenticate
This error is most common when using OAuth authentication and can occur after OAuth configuration changes or when cached credentials become invalid.
Next steps
Once connected, explore the available MCP tools to see what you can do with natural language.
Resources
- MCP Protocol
- Neon API Reference
- Neon API Keys
- Neon MCP server GitHub
- VS Code MCP Server Documentation
Need help?
Join our Discord Server to ask questions or see what others are doing with Neon. For paid plan support options, see Support.